
A Guide on How to Convert Crib to Toddler Bed with Safety
This post contains affiliate links. As an Amazon Associate we earn from qualifying purchases.
To convert a crib to a toddler bed, you need three things: the correct conversion kit or toddler rail for your specific crib model, a full-size crib mattress that measures at least 27 1/4 by 51 5/8 inches, and the mattress support set to its lowest position. The child must be at least 15 months old and under 50 pounds. Missing any one of these specs creates a dangerous entrapment gap.
This isn’t a simple furniture swap. The numbers in that answer are federal safety standards echoed in every crib manual for a reason. A gap wider than two fingers between the mattress and the new rail is an entrapment hazard that has led to infant deaths.
What follows is the full breakdown: the safety checklist you must complete first, the step-by-step disassembly for common crib types, and how to source the right parts when your kit is missing. We’ll use direct quotes from manufacturer manuals to show you where the rules are printed.
Key Takeaways
- The 15-month age and 50-pound weight minimum is non-negotiable. Converting earlier risks entrapment and falls.
- Your crib mattress must be a full-size crib mattress (27 1/4″ x 51 5/8″). A standard twin mattress creates lethal gaps.
- The mattress support platform must be at the lowest setting before you remove any crib side.
- Never use substitute hardware. Overtightening bolts can strip the wood; undertightening makes the rail unstable.
- Store all original crib parts. You’ll need them if you convert the crib back for a new baby or move to a full-size bed later.
The Non-Negotiable Safety Checklist
Before you start: Converting a crib before the child is ready is the single biggest cause of preventable injury. Entrapment gaps form when the mattress is too small or the rail is installed incorrectly. A child can become trapped in less than 90 seconds.
Open your crib’s original assembly manual. If you don’t have it, search online for the PDF using your crib’s brand and model number. This document is your legal and safety guide.
The first page of warnings isn’t filler. It’s the manufacturer’s liability limit and your child’s safety blueprint. Two specs appear in every manual we reviewed.
First, the child’s specs. The consistent rule across Dorel, RH Baby & Child, and Pali manuals is a minimum age of 15 months and a maximum weight of 50 pounds (22.7 kg). This isn’t a suggestion. A child under 15 months lacks the motor skills to navigate an open bed side safely. The 50-pound limit is a structural rating for the toddler rail attachment points.
Second, the mattress specs. This is where most DIY conversions fail quietly.
ANY MATTRESS USED IN THIS CRIB MUST BE AT LEAST 27 1/4 INCHES BY 51 5/8 INCHES (69CM BY 131CM) WITH A THICKNESS NOT EXCEEDING 6 INCHES (15CM).
That quote is verbatim from the Dorel 3-in-1 Convertible Crib manual. The RH Baby & Child Olin crib manual states the same dimensions. Your existing crib mattress must meet these exact measurements. A “standard” crib mattress is this size. A toddler mattress or a mini-crib mattress is not.
If the mattress is even an inch narrower or shorter, it creates a gap between the mattress and the new toddler rail. That gap is an entrapment hazard. The rail provided is engineered to fit this specific mattress footprint.
| Safety Check | Requirement | Consequence If Wrong |
|---|---|---|
| Child’s Age | At least 15 months | High risk of fall and inability to self-rescue from entrapment. |
| Child’s Weight | 50 lbs (22.7 kg) or less | Toddler rail attachment points are not rated for more weight; rail may detach. |
| Mattress Size | 27 1/4″ x 51 5/8″ (Full-size crib) | Gap wider than 1 3/16″ can trap head/neck. |
| Mattress Support | At lowest possible position | Higher position makes bed easier to climb out of, increasing fall risk. |
| Hardware | Original manufacturer bolts only | Substitute bolts may be wrong length or thread, causing rail instability. |
Check the mattress support platform. It must be at the lowest setting. This is not just for the toddler bed—the Pali Design manual states you must move it to the lowest position “as soon as baby starts to sit up.” If it’s not there already, lower it before you unscrew a single bolt.
Identifying Your Crib Type and Finding Parts
There are three common convertible crib designs. Your process depends on which one you have.
1. The “3-in-1” or “4-in-1” Crib (Dorel, Babyletto, Mercer). This is the most common. It converts from crib to toddler bed (with a rail) to a daybed or full-size bed (with a separate kit). The toddler rail is often sold separately. You must match the model number.
For example, the Dorel 3-in-1 Convertible Crib requires a specific Toddler Rail with model numbers like DA8007409 (White) or DA8007909 (Gray). Using a generic rail from the hardware store will not work and is dangerous.
2. The Crib with a Dedicated Conversion Kit (RH Baby & Child Olin). Higher-end cribs often have a specific toddler bed conversion kit sold separately. The kit contains a custom-sized rail and all necessary, shorter bolts. The RH Olin kit uses “Short Bolts” inserted into upper holes on the headboard and footboard.
3. The Crib with All Hardware Included (Some Mercer & Delta Models). Some cribs, like the Mercer 3-in-1, include the toddler rail and all conversion hardware in the original box. The manual will state “All of the parts and hardware you will need are supplied with the crib at the time of purchase.”
If your parts are missing, contact the manufacturer directly. The customer service number is in the manual. Have your crib’s model number and finish ready. Ordering the correct toddler bed safety rails is cheaper and safer than improvising.
The Core Conversion Steps
The physical work takes about twenty minutes if you’re prepared. You need a Phillips screwdriver and the included Allen wrench. Do not use a power drill.
Step 1: Clear the area and lay down a blanket. You’ll be removing a large side panel. Protect your floor and the crib’s finish from scratches.
Step 2: Lower the mattress support to the lowest level. Do this now. On most cribs, you squeeze spring clips on the ends of the support frame to lower it. You should hear a solid click at each corner.
Step 3: Remove the front crib side. This is usually the side with the drop-down mechanism. Locate the bolts securing it to the headboard and footboard posts. They are often longer “3-inch Round Head Bolts” with barrel nuts inside the post.
- Unscrew and remove these bolts, washers, and nuts.
- Carefully lift the entire front side panel away and set it aside. Store all hardware in a zip-top bag labeled “Crib Side.”
Step 4: Attach the toddler rail. Position the rail so its top edge is level with or slightly above the mattress platform. The rail often has a “high side” that can face left or right—it doesn’t matter for safety, only for aesthetics.
Insert the provided bolts through the rail and into the pre-drilled holes on the headboard and footboard posts. Hand-tighten all bolts first.
Step 5: Final tightening and check. Use the Allen wrench to snug each bolt. The RH Olin manual gives a critical tip: “DO NOT overtighten.” You want the bolt firm, but cranking it down can strip the soft wood of the post or crack the rail.
Finally, push the mattress firmly into the corner against the rail. Measure the gap. If you can fit more than two fingers between the mattress and the rail, your mattress is too small. You need a proper full-size crib mattress for a toddler bed.
Where This Goes Sideways: Common Mistakes
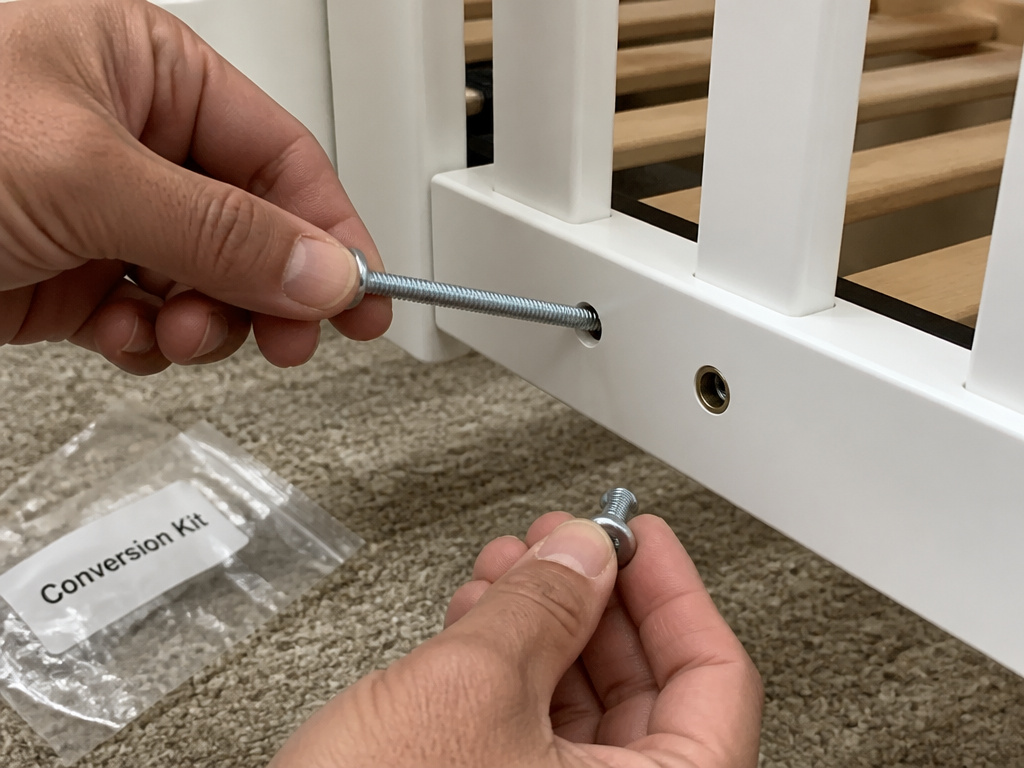
Common mistake: Using the crib-side hardware to attach the toddler rail. The toddler rail always uses shorter bolts. Using the long crib-side bolts means the bolts bottom out before the rail is tight, creating a wobbly, dangerous connection.
People lose the small bag of conversion hardware. They assume bolts are bolts. They are not. The length and thread count are specific. If you use the wrong bolt, the rail can seem tight but will work loose after a week of a child climbing in and out.
Another silent error is skipping the mattress check. That old mattress might have compressed over two years. A compressed mattress sinks lower, increasing the effective height of the rail and the risk of a fall. If the mattress is thinner than 4 inches, it’s time for a replacement.
What about a floor bed instead? For a child new to an open bed, a floor bed eliminates fall risk entirely. It’s a valid alternative to converting the crib, especially for beds for 2 year olds who are active climbers.
After Conversion: The New Rules
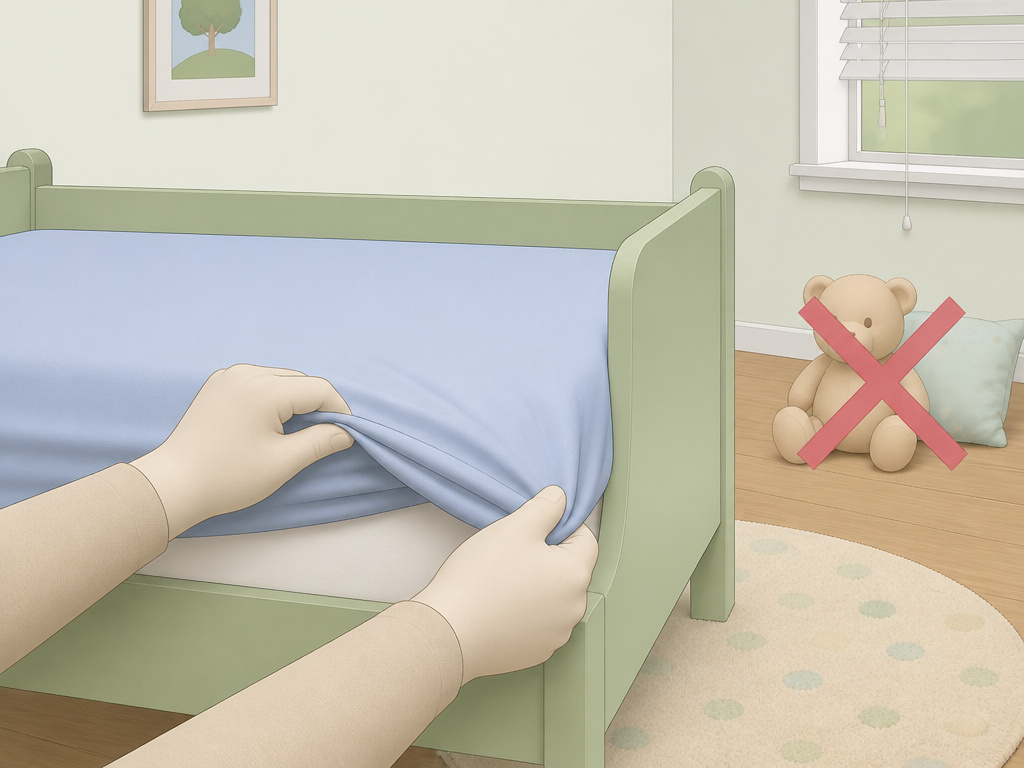
The toddler bed phase has its own safety protocol. The environment around the bed changes.
No more crib bumpers, large stuffed animals, or pillows. These become climbing aids. A simple fitted sheet and a lightweight blanket are all you need.
Furniture placement is critical. The Consumer Product Safety Commission (CPSC) warns against placing any bed near windows. Cords from blinds are a strangulation hazard. Keep the bed away from shelves, dressers, or wall decor the child could pull down.
Inspect the hardware weekly. For the first month, check the tightness of every bolt on the toddler rail every seven days. Wood settles and hardware can loosen. After that, a monthly check is sufficient.
This is also the time to consider if a dedicated toddler bed makes more sense. If your crib is older or you plan to use it again as a crib, constant conversion and re-conversion can wear out the bolt holes. A standalone bed preserves the crib.
Frequently Asked Questions
Can I convert any crib to a toddler bed?
No. Only cribs marketed as “convertible” are designed for this. A standard, non-convertible crib lacks the reinforced posts and pre-drilled holes to safely anchor a toddler rail. Attempting to modify one voids all safety certifications and is extremely dangerous.
My conversion kit is lost. Can I buy a universal toddler rail?
We do not recommend universal rails. Safety depends on a precise fit between the rail, the crib posts, and the mattress. A universal rail may not align with your crib’s bolt holes, creating a weak point. Always source the manufacturer-specific kit. If unavailable, a dedicated crib to toddler bed is a safer investment.
Is it safer to just buy a toddler bed?
Sometimes, yes. If your crib is not a convertible model, or if the conversion kit is expensive or lost, a new toddler bed for a two-year-old can be more cost-effective and simpler. It also lets you keep the crib intact for future use.
How long can my child use the toddler bed conversion?
Until they reach the 50-pound weight limit or a height of 35 inches, whichever comes first. At that point, they have outgrown the crib’s intended structure. The next step is a twin bed with appropriate bed rails.
What if my child keeps falling out?
Falling out once or twice is common during the adjustment period. Ensure the mattress is at the lowest setting. You can place a soft rug or foam mats on the floor beside the bed. If falls persist, a toddler floor bed eliminates the fall distance entirely and is often recommended by Montessori approaches.
Before You Go
Converting a crib is a milestone, but it’s an engineering task first. Treat the manual as law. Match the model numbers. Respect the weight limit. Measure the mattress.
The goal is a safe, secure sleep space that gives your child a little more independence. When done by the book, that’s exactly what a converted crib provides. If any part of the process feels off—the fit isn’t snug, the hardware is wrong—stop. The safest path is often to choose one of the many excellent, purpose-built convertible cribs that become toddler beds designed from the start for this transition.
