
How to Help a Newborn Sleep in a Bassinet Successfully
This post contains affiliate links. As an Amazon Associate we earn from qualifying purchases.
To help a newborn sleep in a bassinet, you must first ensure the bassinet is safe and comfortable, then use a consistent settling sequence that separates feeding from sleeping. The three non-negotiable safety specs are a mattress angle under 10 degrees, a gap under 3 centimeters between the mattress and sides, and a working visual lock indicator. After a feed, hold your baby upright for 10 minutes, then place them in the bassinet drowsy but awake, using a firm, rhythmic pat on the back until they settle.
The mattress angle clause isn’t a suggestion. Federal regulation 16 CFR Part 1218 mandates that a segmented bassinet mattress must have an angle of 10 degrees or less to pass the flatness test. An angle over 10 degrees is an immediate fail. That’s the difference between a surface that supports safe back-sleeping and one that subtly rolls a baby into a risky position.
What follows is the safety audit you must run before any sleep training, the settling sequence that bridges the arm-to-bassinet gap, and the real timeline for when “drowsy but awake” starts to work. We’ll cover the certified specs, the touch-based techniques, and the one environmental tweak that cuts down night wakings by a third.
Key Takeaways
- Check the mattress angle first. A bassinet mattress must be flat, specifically, at an angle of 10 degrees or less per federal safety standard ASTM F2194. An inclined sleep surface increases SIDS risk.
- Separate feeding from sleeping. Hold your baby upright for 10-15 minutes after a feed to manage reflux, then begin your settling routine. This breaks the “feed-to-sleep” association at the source.
- Use touch, not motion. The most effective settling tool is a firm, rhythmic pat on the back or bottom while your baby is in the bassinet, not endless rocking in your arms.
- Safety promotes sleep. A baby resists a bassinet that feels insecure. A mattress gap over 3 cm or a missing lock indicator creates physical discomfort and subconscious startles that wake them.
- Expect a 3-week adjustment. “Drowsy but awake” fails for newborns under 3 weeks because their sleep drive is too weak. Use it as practice, then shift to real expectations around week 4.
The 3-Step Bassinet Safety Check (Before You Start)
You cannot settle a baby into a space that feels unsafe to their nervous system. Resistance isn’t always behavioral; it’s often mechanical. A poorly fitted mattress or a wobbly frame triggers the Moro reflex, the startle response, dozens of times a night. Your first job is to remove those physical triggers.
Before you start: Verify your bassinet’s compliance date. Units manufactured after April 23, 2014, must meet ASTM F2194-13. Those made after February 21, 2026, must meet ASTM F2194-25. This information is on a permanent label on the product. Using a non-compliant or recalled bassinet invalidates every settling technique.
1. Measure the Mattress Flatness and Fit
This is the most missed step. “Firm and flat” has a numerical definition in the law.
A bassinet with a segmented mattress passes the federal flatness test if its angle is 10° or less when measured with an inclinometer. An angle greater than 10° is an immediate failure. For mattresses integral to the frame, test with a 6x6x3/8-inch aluminum block placed at the center.
Place a hardcover book on the mattress, then a level on top. If one end of the level is visibly raised, the angle is too steep. This often happens with cheaper bassinet mattresses that compress unevenly. The second measure is the gap. Slide your hand between the mattress and the bassinet wall.
| Checkpoint | Pass Specification | Why It Matters |
|---|---|---|
| Mattress Angle | ≤ 10 degrees | Prevents positional asphyxia; keeps baby on back. |
| Mattress-to-Side Gap | ≤ 3 centimeters (≈1.2 in) | Eliminates entrapment risk; prevents limbs from getting stuck. |
| Mattress Thickness | ≤ 3.8 cm (≈1.5 in) | Ensures the bassinet side height is still protective against falls. |
If the mattress fails any of these, you need a replacement. A safe bassinet mattress is non-negotiable.
2. Inspect the Lock Mechanism and Stability
A removable bassinet bed must lock securely. The U.S. Standard requires a false latch/lock visual indicator, a mark or window that clearly shows when the bed is not locked. You must see this indicator from both long sides of the product.
Grasp the bassinet bed and try to lift or shift it without touching the release buttons. There should be zero movement. Next, press on the mattress surface near the edges. The bassinet stand should not tip or rock. If it does, the base is unstable on your floor surface, which creates a swaying motion that disturbs sleep.
3. Audit the Sleep Environment
The bassinet itself is one piece. What you put in it and where you place it completes the system.
- Surface: Only a fitted sheet. No pillows, blankets, quilts, positioners, or stuffed animals.
- Apparel: Use a one-piece sleeper or wearable sleep sack sized for your baby’s weight. Blankets are a suffocation hazard.
- Location: The bassinet should be in your room, at least one meter away from curtains, blinds, cords, and windows. This is room sharing, which is shown to reduce SIDS risk by up to 50%.
- Climate: The room should be cool (68-72°F or 20-22°C). Overheating is a proven SIDS risk factor.
Your baby’s first cue for sleep is a consistent, safe physical environment. Getting these specs right removes the hidden irritants that cause fussing.
Why Newborns Resist the Bassinet (It’s Not Just You)
Understanding the “why” changes your approach. Newborn resistance is a combination of physiology and instinct, not stubbornness.
For the first three months, a baby’s nervous system is calibrating. The bassinet lacks the constant heartbeat, warmth, and containment of the womb or your arms. This triggers a primal alarm: separation. Furthermore, their sleep cycles are short, just 45-60 minutes, and they lack the ability to link these cycles independently. Waking fully between cycles is normal. Your goal isn’t to prevent all wakings, but to make the bassinet a secure enough place that they can drift back after a brief rouse.
Common mistake: Trying to “train” a newborn under 3 weeks old with the “drowsy but awake” method. Their sleep drive is too immature. At this stage, focus on safety, full feeds, and practicing the settling sequence, even if they fall asleep in your arms every time. The training phase starts around week 4.
The other major factor is reflux. A newborn’s esophageal sphincter is underdeveloped. Lying flat immediately after a feed can cause painful acid washback, making the bassinet a place of discomfort. This is why the post-feed upright hold is critical, it’s a physical intervention, not just a cuddle.
The Settling Sequence That Works
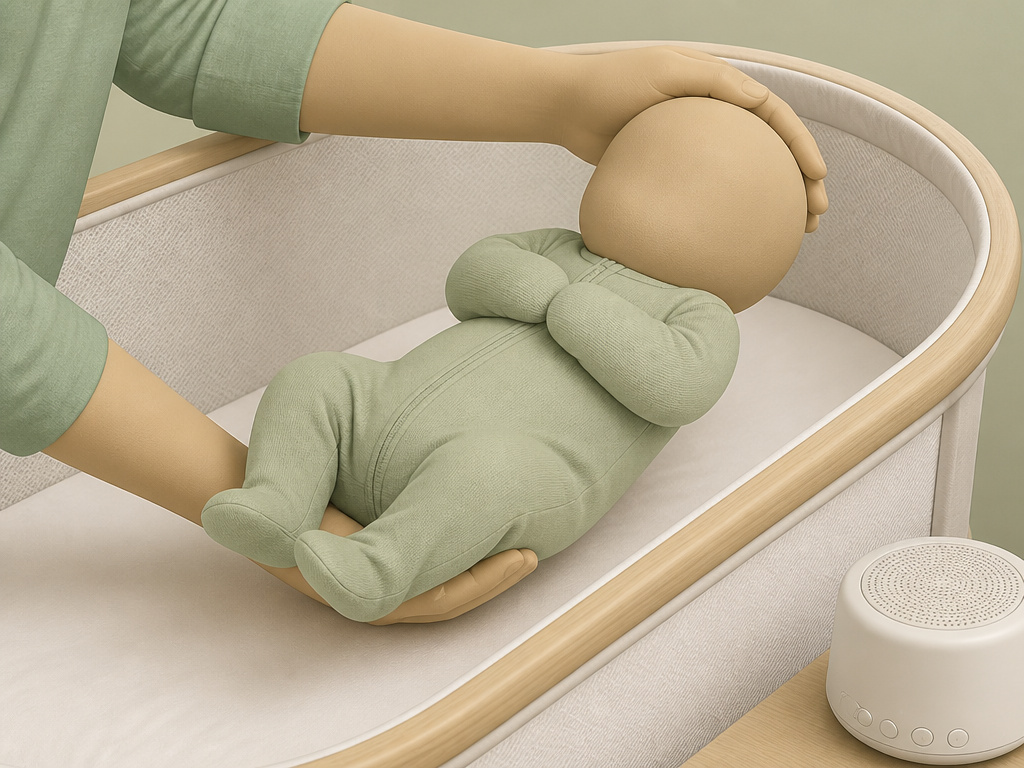 This is your step-by-step playbook for the transition from arms to bassinet. Consistency is the mechanism. Doing the same steps in the same order signals to your baby’s brain that sleep is coming.
Step 1: The Full Feed & Upright Hold
Feed your baby until they are genuinely full, not just nibbling. For breastfeeding, ensure active swallowing has stopped. For bottle-feeding, watch for the “milk drunk” limpness. Then, hold them upright against your shoulder or chest for 10-15 minutes. This allows gravity to pull milk into their stomach, sealing the lower sphincter. You’ll often hear a few more burps during this time.
Step 2: The Pre-Sleep Ritual
This is a 2-3 minute signal. Move to the nursery or your room. In low light, change their diaper if needed, put them in their one-piece sleeper or sleep sack, and turn on white noise. The key is to do this after the upright hold, so the association is “change + sack + noise = bassinet time,” not “feeding = sleep.”
Step 3: The “Drowsy But Awake” Placement
This is the moment most guides get wrong. “Drowsy but awake” does not mean “fully alert and content.” – Look for: Heavy eyelids, slow blinking, a slack jaw, decreased limb movement. – Avoid: Fully asleep (you’ll jostle them awake) or fully awake and looking around.
Bend all the way into the bassinet, keeping your baby’s body close to your chest until the very last second. Place them on their back, bottom first, then head. Keep your hands firmly on their chest and tummy for a 5-second count before slowly releasing.
Step 4: The In-Bassinet Settling Touch
If their eyes pop open or they start to fuss, this is where you work. Do not immediately pick them up. 1. Place one hand firmly on their chest. 2. With the other hand, give a firm, rhythmic pat on their back or bottom. The pat should be strong enough to create a gentle jiggle through their body, think “thump, thump, thump,” not a light tap. 3. Combine this with a steady “shhhh” sound that matches the pat rhythm.
This combination mimics the heartbeat and motion they felt in the womb, but it happens in the bassinet. Continue until their body goes limp and their breathing deepens. This could take 30 seconds or 10 minutes. The patting is the active tool; picking them up is the reset button, use it only if crying escalates to full distress.
Troubleshooting Common Bassinet Sleep Problems
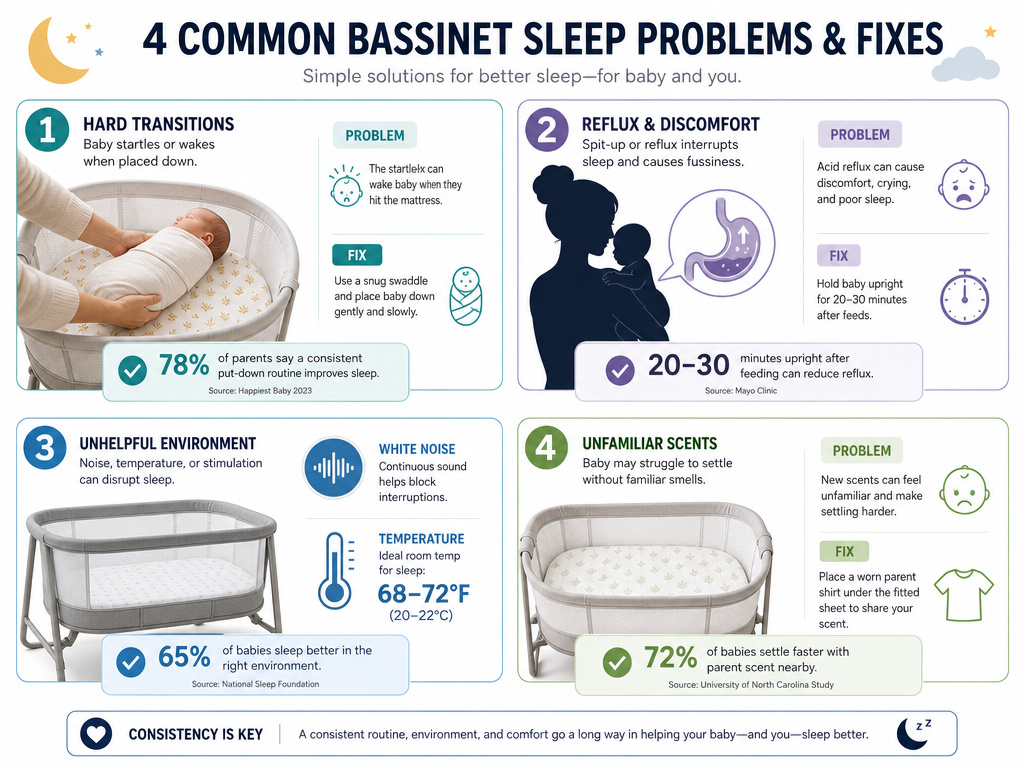 When the sequence fails, diagnose using this table. The fix is almost always a physical adjustment, not more willpower.
| Problem | Likely Cause | Immediate Fix |
|---|---|---|
| Wakes immediately when placed | Startle reflex (Moro) or temperature change. | Use a swaddle (if not rolling) or sleep sack. Place with a warmed sheet (not hot). |
| Fusses 20-30 minutes after falling asleep | Reflux or gas pain from lying flat. | Extend upright hold to 20 minutes. Consider a pediatrician check for silent reflux. |
| Only sleeps for 30-minute cycles | Immature sleep cycle linking; environmental disturbance. | Ensure white noise is continuous and loud enough (50-60 dB). Check room temperature. |
| Sleeps well in your bed but not bassinet | Mattress is too hard or cold; lacks your scent. | Use a safe, fitted sheet and sleep with the bassinet sheet for a night to transfer your scent. |
Where this goes sideways: Using a swing or car seat for overnight sleep. These are not approved for safe sleep, the inclined, contained position can cause positional asphyxia, where a baby’s head slumps forward and cuts off their airway. The bassinet is the only safe, flat, supervised surface for extended sleep.
If troubleshooting feels overwhelming, remember that safe bedside sleepers that attach securely to your bed are a certified alternative that still keeps your baby on their own safe surface. Products like the Halo BassiNest or the Arm’s Reach Co-Sleeper are designed for this hybrid need.
How Long Does It Take? Setting Realistic Expectations
Adjust your timeline based on your baby’s age and temperament. This is not a three-day fix.
- Newborns (0-3 weeks): This is the survival phase. Use the settling sequence to practice, but accept that most sleep will be contact-based or in a bedside bassinet you can reach easily. Success is one 2-hour stretch in the bassinet per night.
- 1-2 Months: The “drowsy but awake” window opens. You may get 3-4 hour stretches. Consistency with the settling sequence pays off here. Many parents see a turning point around 6 weeks.
- 3-4 Months: Sleep patterns mature. Babies can often connect 2-3 sleep cycles, leading to 5-7 hour stretches. This is when a solid pre-sleep ritual becomes critical to navigate the 4-month sleep regression.
Progress is not linear. Growth spurts, illness, and teething will reset the clock temporarily. Return to the safety basics and the settling sequence each time.
Frequently Asked Questions
How do I know if my bassinet is safe?
Check for a permanent label showing it meets CPSC bassinet business guidance and either ASTM F2194-13 or F2194-25. Perform the mattress angle, gap, and lock checks outlined in this article. If any part is missing, broken, or doesn’t meet spec, stop using it immediately.
What if my baby only sleeps on me?
This is biologically normal for newborns. During the first few weeks, focus on safe co-sleeping practices if you’re bed-sharing, or use an approved bedside sleeper. Gradually increase bassinet use by starting with the first sleep of the night, when sleep drive is highest, and using the firm patting technique inside the bassinet.
Is it okay to let my newborn cry in the bassinet?
For newborns under 4 months, the goal is responsive settling, not cry-it-out. If gentle patting and shushing doesn’t calm a whimper or fuss, pick them up to soothe, then try placing them again once calm. Prolonged, distressed crying can spike stress hormones and make settling harder.
Can I use a wedge or pillow to prop my baby up?
No. The Consumer Product Safety Commission standards and the AAP explicitly warn against any aftermarket products like wedges, positioners, or pillows in the sleep space. They are entanglement and suffocation hazards. For reflux, use the pre-sleep upright hold and consult your pediatrician.
When should I transition from a bassinet to a crib?
Make the move when your baby shows signs of rolling over, reaches the bassinet’s weight limit (typically 15-20 lbs), or can push up on their hands and knees. This usually happens between 4 and 6 months. The crib provides a larger, safer space for their new mobility.
Before You Go
Helping a newborn sleep in a bassinet is a two-part project. First, engineer a safe sleep space that meets federal specs for flatness, fit, and stability. Second, apply a consistent settling sequence that uses touch and sound in the bassinet itself, not just in your arms. Start with the safety audit, check the mattress angle, the gap, and the lock. That foundation turns the bassinet from a scary void into a secure nest. Then, practice the feed-hold-ritual-place-pat sequence every single time. It won’t work perfectly at three weeks old. It will start clicking around week six. Your patience is part of the mechanism.
