
How to Repurpose a Baby Quilt | The 60″x60″ Jacket Rule
This post contains affiliate links. As an Amazon Associate we earn from qualifying purchases.
To repurpose a baby quilt, you need a quilt at least 60 inches square for a jacket, match new fabric to old by thread count and fiber, and never machine-wash a fragile or historically valuable piece. The process turns sentimental fabric into a wearable jacket, decorative pillow, or framed keepsake by assessing condition, choosing a stable project, and using conservation-grade techniques for repairs.
That 60-inch minimum isn’t a suggestion. It’s the floor for a wearable quilt jacket pattern, pulled straight from a sewing machine manufacturer’s design notes. Go smaller and the sleeves won’t fit, or the back panel runs short. Your quilt’s usable area dictates everything.
What follows is a map for three proven paths: the quilt jacket, the keepsake pillow, and the artful patchwork repair. Each path starts with a condition check and ends with a finished object that holds the memory without trapping it in a closet.
Key Takeaways
- A quilt must measure at least 60″x60″ to yield enough fabric for a simple jacket pattern; smaller quilts are better suited for pillows or wall art.
- Never machine-wash a quilt from before 1910 or one with visible fading and weak seams, the agitation destroys historic fibers. Contact the American Institute for Conservation.
- Match new fabric to old by using 100% cotton with a thread count of 300 or less to prevent puckering and uneven shrinkage in the final wash.
- For invisible repairs on printed fabrics, photocopy intact sections onto freezer-paper-backed cotton to create perfectly matched patches for holes 4 to 8 inches wide.
- If your quilt is too worn for structural use, salvage the best blocks or appliqués and frame them under UV-protective glass as standalone art.
The First Cut: Assessing Your Quilt’s Condition
You don’t start with scissors. You start with a bright light and your hands. Lay the quilt flat on a clean surface. Run your fingers gently over every seam, block, and binding. You’re feeling for two things: structural integrity and sentimental weight.
Where this goes sideways: Assuming all cotton is the same. A 1970s quilt and an 1890s quilt react differently to handling. Fibers weaken with age, light, and improper storage.
Check the fabric for thin spots by holding it up to a window. Fading is one thing; fiber disintegration is another. If the fabric feels brittle or tears with a gentle tug, the quilt is a candidate for display, not daily wear. Pay special attention to the binding and the quilt’s back, these areas see the most stress. Any quilt showing significant wear in multiple blocks is a patchwork project, not a jacket project.
Is it historically valuable or fragile? The rule is absolute. According to a university textiles publication, any quilt made before the widespread use of manufactured fibers (around 1910) or one that is visibly fragile should go to a professional. The Nebraska Extension quilt care guide explicitly states that home cleaning can cause irreversible damage. They list the American Institute for Conservation in Washington, D.C., as a resource for finding a qualified textile conservator.
| Condition | Best Project Path | Risk If Ignored |
|---|---|---|
| Strong seams, minimal fading, sturdy fabric | Quilt jacket or pillow | None; fabric can handle construction. |
| Isolated worn blocks or small holes | Patchwork repair, then pillow | Hole enlarges with use, batting leaks out. |
| Overall thinness, brittle fabric, pre-1910 origin | Framed art blocks only | Construction stress causes tears; washing destroys it. |
| Stains or odors on otherwise strong fabric | Spot clean, then any project | Odor sets permanently; stain spreads in wash. |
Your goal is to match the quilt’s physical reality to a project it can survive. A jacket needs durable, flexible fabric. A pillow can tolerate a few stable weak spots. Framed art asks for nothing but a flat surface.
The 60″x60″ Jacket Rule
If your quilt passed the hand test and measures at least 60 inches on each side, you have a jacket candidate. This dimension comes from pattern designers who need that much continuous fabric to cut sleeves, a back, and two front panels. A smaller baby quilt, like a 36″ square crib size, won’t yield the pieces.
The process isn’t about draping a quilt over your shoulders and sewing up the sides. You’ll use a simple, boxy jacket pattern, often called a “walking jacket” or “quilt coat” pattern, designed for woven fabrics. Patterns from brands like Folkwear or straightforward styles from independent designers work best. Avoid patterns with darts, complex shaping, or set-in sleeves; you’re working with a pre-quilted material that doesn’t drape like single-layer fabric.
Why the size minimum matters mechanically. A quilted fabric is thick. When you cut pattern pieces, you need extra margin around each piece to account for the batting’s loft and to match patterns across seams. A 60-inch square gives you the layout flexibility to position pattern pieces away from worn edges or stained centers. If you try to squeeze a pattern onto a 45-inch square, you’ll compromise on grainline or piece sleeves from scraps, creating weak points at the seams.
Worth knowing before you start: Pre-wash any new fabric you plan to combine with the quilt, like lining or bias tape. An unwashed quilting cotton attached to a pre-shrunk, well-loved quilt will pucker and pull in the first wash. This uneven shrinkage is the reason many quilters avoid mixing old sheets with new fabric.
Here’s the basic sequence: 1. Disassemble (if needed). If your quilt has a damaged back but a perfect top, carefully remove the stitching to separate the top from the batting and backing. You only need the top layer for the jacket exterior. 2. Press, don’t iron. Use a warm iron on the steam setting and press gently from the back. Never scrub the iron back and forth over old fabric. 3. Layout and cut. Pin your pattern pieces to the quilt top, aligning the grainline with the quilt’s weave. Cut slowly with sharp fabric shears. 4. Construct. Sew with a longer stitch length (3.0 mm) to avoid perforating the aged fabric. Reinforce shoulder and armhole seams with stay tape. 5. Line it. A silky lining isn’t just for luxury. It protects the quilt’s inner batting from catching on your clothes and makes the jacket easier to slide on and off.
The result is a one-of-a-kind layer with history built in. It’s warmer than a cardigan and carries a story in every stitch.
The Patch-and-Patchwork Path
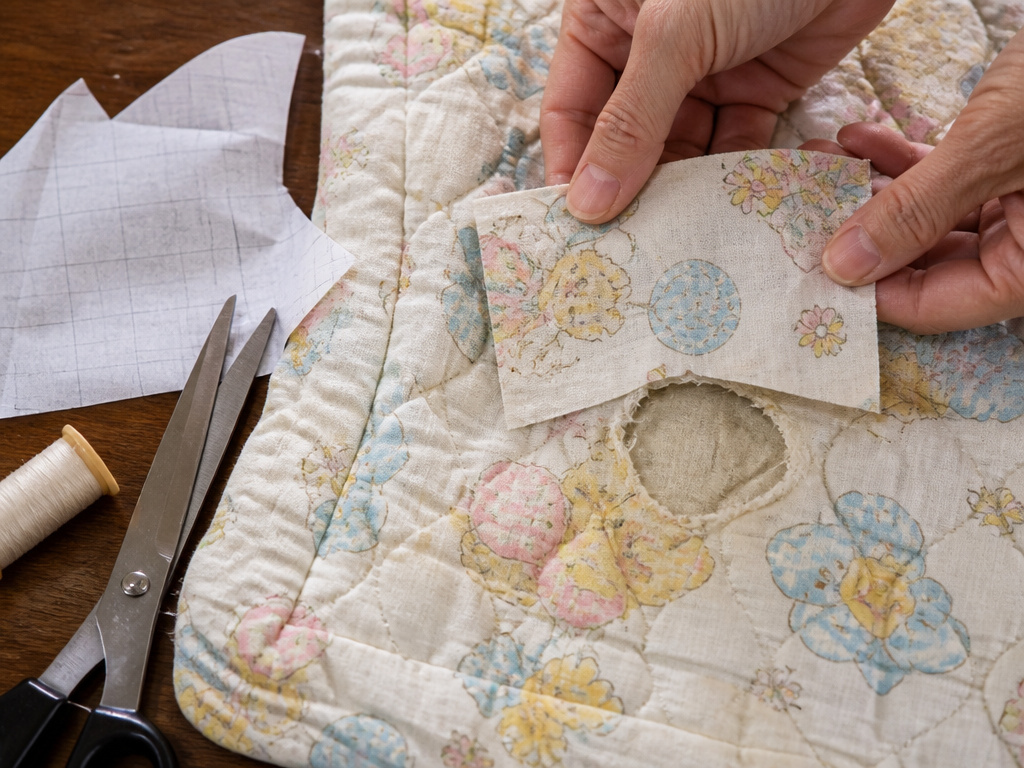
Maybe your quilt has a few bruised elbows, localized wear in specific blocks or along the edges. This doesn’t condemn it to the display case. It marks it for repair and reinvention, often into something like a throw pillow that sees gentler use.
Repairing a quilt for repurposing is different from conservation. You’re not trying to restore it to museum quality; you’re stabilizing it for a second life. The trick is making repairs that look intentional, not medical.
For printed fabrics with a distinct pattern, there’s a clever method documented by textile experts. For a hole between 4 and 8 inches, you can create a near-perfect patch. Take an intact section of the same fabric, iron it onto an 8.5″x11″ sheet of freezer paper (waxy side to fabric), and run it through a standard photocopier. The copy transfers the pattern onto blank cotton, giving you a matching patch you can cut, seam, and appliqué over the hole. This only works if the original fabric has enough contrast to copy.
Photocopy intact fabric onto freezer-paper-backed cotton to create a pattern-matched patch for holes 4 to 8 inches wide. It’s a salvage trick for prints you can’t find anywhere else.
For overall thinning, consider “shadow patching.” Place a new, complementary fabric behind the weak area and use a tight zigzag or decorative stitch to secure the old fabric to the new backing. The repair becomes a textural feature. This is an ideal technique for personalized baby blankets where the embroidery or monogram is still strong but the surrounding fabric is giving way.
| Repair Type | Best For | Tool & Technique |
|---|---|---|
| Photocopy Patch | Defined print holes 4″-8″ wide | Freezer paper, photocopier, appliqué stitch |
| Shadow Patch | Overall thinning, weak seams | Complementary backing fabric, zigzag or blanket stitch |
| Decorative Appliqué | Large damaged areas, stained blocks | New fabric cut into shapes (stars, hearts), topstitched |
| Re-backing | Entire quilt back is damaged | New 100% cotton sheet, baste, then quilt along original lines |
Once repaired, the quilt section is ready for its next form. A 24-inch square cut from the center can become a pillow front. Borders can be cut into strips for a patchwork bolster. The goal is to isolate the strongest, most beautiful parts.
The Soft Landing: Quilted Pillows
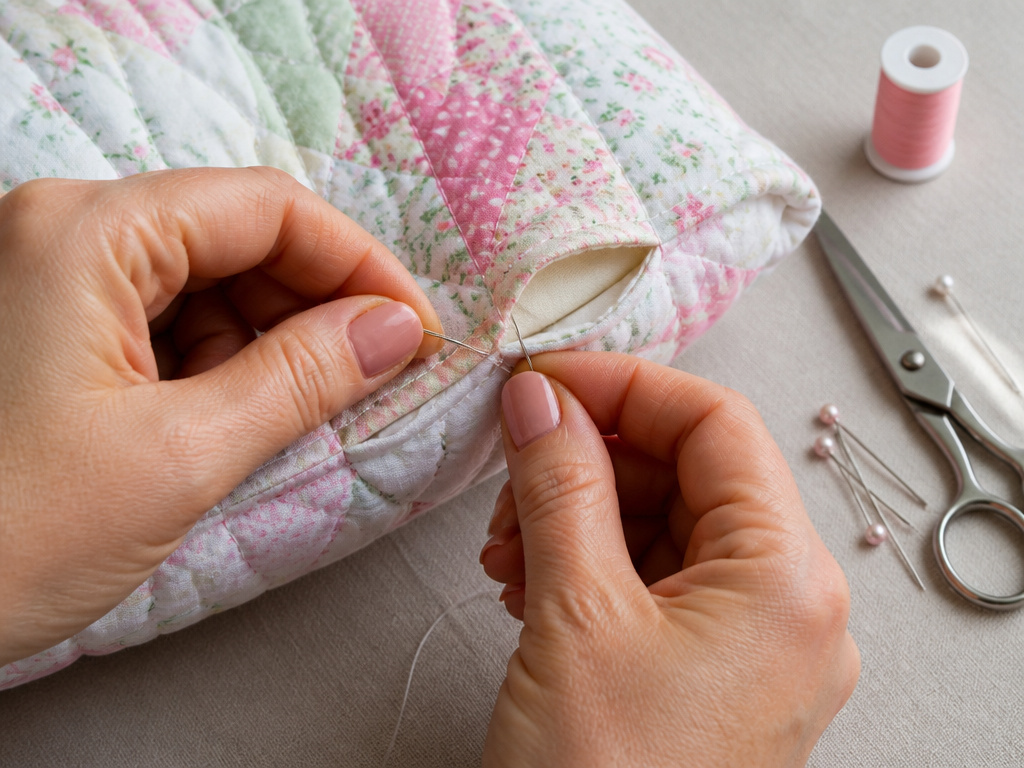
A pillow is the most forgiving project for a repurposed quilt. It requires less fabric, handles repairs more easily, and puts the quilt’s best face forward. You can make a standard pillow, a lumbar roll, or a decorative sham.
Start with a clean, stable section of the quilt. For a standard 20″ pillow, you’ll need two 21″ squares (allowing for a ½” seam). The key is ensuring both the front and back pieces have similar stability. If the quilt back is worn, replace it with a new fabric that complements the top, a soft flannel or a crisp percale.
Construction steps for a knife-edge pillow:
- Cut your two squares. If using a quilted front, consider whether you want the piping or binding from the original quilt to be a design element on the edge.
- Add piping (optional). Piping gives a professional finish and reinforces the seam. Use a custom baby blanket cord and bias tape made from a coordinating solid.
- Sew the front and back together, right sides facing, leaving a 6-inch gap on one side for turning and stuffing.
- Clip corners, turn right side out, and press the seam allowances flat.
- Stuff firmly with polyester fiberfill. Hand-stitch the opening closed with a ladder stitch.
For a quicker project, skip the zipper and piping. A simple envelope-back closure made from two overlapping fabric panels lets you remove the cover for washing. This is a smart approach if you’re using the pillow in a child’s room or living area.
Why a pillow works so well: the quilt’s existing batting provides built-in loft and texture. You’re essentially just framing it. This is the perfect destination for those beloved receiving blankets that are too soft to cut up for a jacket but too worn for swaddling. Their smaller size and often-solid colors make elegant, simple pillow fronts.
When to Frame, Not Sew
Some quilts are too fragile for needle and thread. Their value is purely visual and sentimental. For these, the best repurposing is as archival art. This is often the case with heirloom quilts, christening quilts, or ones with significant damage that would make structural use disrespectful.
Your job is to preserve, not alter. Select the most intact, visually compelling block or section. It might be a single perfect star, an embroidered name and date, or a striking appliqué. Cut a generous margin around it, you’re not cutting the block itself, but the damaged surrounding fabric.
The framing must be conservation-grade to prevent further damage:
- Use a deep shadow box frame to prevent the glass from pressing on the quilt’s texture.
- Opt for UV-protective acrylic or glass. Sunlight will fade historic dyes in months.
- Do not glue or dry-mount the fabric. Instead, use archival-quality linen tape to gently tack the top edge of the quilt section to an acid-free foam core backing, allowing the fabric to hang freely.
- Ensure the backing is acid-free mat board. Regular cardboard off-gases and will yellow and weaken the fabric over years.
This approach transforms a fragile heirloom into a protected display piece. It’s the definitive answer for a quilt that can’t be used but shouldn’t be hidden. The memory stays in the light, not in a box.
Sourcing Your Support Materials
You’ll need more than just the quilt. The new fabrics and supplies you choose determine whether your project feels cohesive or clunky. The rule is to match the character and quality of the original.
Fabric for Linings, Patches, and Backs: Always choose natural fibers. For most vintage cotton quilts, seek out 100% cotton with a thread count of 300 or less. High-thread-count sheets are woven too tightly and have a different hand; they’ll pucker when sewn to looser-weave vintage cotton. A quality quilting cotton from a brand like Robert Kaufman or Moda is a safe bet. For a silky lining, use Bemberg rayon or habotai silk, both are breathable and have a gentle drape.
Batting for Stability: If you’re re-quilting a section or building a pillow, you’ll need batting. For a lightweight finish that mimics the original, use a cotton or cotton-blend batting like Warm & Natural. For a loftier, more defined quilted look, a thin polyester batting works. When using batting scraps, don’t try to fuse or stitch them together for a large project; the join will create a hard ridge. Use them only for small practice pieces or stuff them inside the pillow you’re making.
Thread and Notions: Use a quality polyester or cotton-covered polyester thread in a neutral color (light grey or beige) for construction. For visible topstitching or quilting, match the original thread color if possible. Your needle matters: use a sharp (not a ballpoint) in size 80/12 for piecing, and a 90/14 for going through multiple quilt layers.
Easy to miss: The needle. A fresh, sharp needle prevents skipped stitches and pushing older threads aside, which can cause runs in delicate fabric. Change it after every four hours of sewing on a quilt project.
These materials are the support system. Using the right ones is the difference between a project that lasts for years and one that frays after its first season.
Frequently Asked Questions
Can I use a baby quilt with polyester batting for a jacket?
Yes, but it will be warmer and less breathable than one with cotton batting. Polyester batting holds more heat and can make the jacket feel bulky. Test-sew a scrap first to see how your machine handles the thicker, springier material, you may need a walking foot.
How do I clean a quilt before repurposing it?
For a sturdy, modern quilt, a gentle machine cycle in cold water with a mild detergent is fine. Lay flat to dry. For any quilt that is old, fragile, or has uncertain fibers, do not wet clean it yourself. Shake it out outdoors or vacuum it gently through a mesh screen. For stains or odors, consult the Nebraska Extension quilt care guide or contact a textile conservator.
What if my quilt is too small for a jacket?
Small quilt is perfect for pillows, a tote bag, or a wall hanging. A crib-sized quilt (around 36″x52″) can yield two standard pillow fronts or a generous tote bag panel. You can also cut it into a set of four coordinating coasters or a table runner.
Is it wrong to cut up an heirloom quilt?
This is a personal decision. If the quilt is in good condition and stored unused, cutting it for a wearable keepsake can give it new life and visibility. If it is a rare, historic, or museum-quality piece, preservation is likely the better path. When in doubt, frame a section instead of cutting it for construction.
Can I mix my old quilt with new quilting fabric?
You can, but you must pre-wash the new fabric to prevent uneven shrinkage. Also, match the fiber content and weight as closely as possible. A lightweight vintage cotton paired with a heavy modern homespun will wear and drape differently, creating stress points.
What’s the best project for a first-timer?
Simple envelope-back pillow. It requires straight seams, no zippers, and lets you showcase a beautiful block of the quilt with minimal cutting and risk. It’s a rewarding weekend project.
The Bottom Line
Repurposing a baby quilt starts with honest assessment. Measure it, feel its strength, and respect its limits. The 60-inch jacket is a commitment of fabric and effort. The patched pillow is an act of salvage. The framed block is an act of preservation.
Match your materials with intention, low-thread-count cotton, fresh needles, archival framing supplies. The goal isn’t just to make something new. It’s to extend the story of the fabric in a form that can be used, seen, and loved again. Whether you choose a jacket, a pillow, or a shadow box, you’re not breaking with the past. You’re drafting its next chapter.
