
How Arm Knitting Baby Blanket Works: Simple Techniques & Tips
This post contains affiliate links. As an Amazon Associate we earn from qualifying purchases.
Arm knitting a baby blanket requires about 7 pounds of roving wool, creates roughly 25 rows, and takes around 40 minutes from first loop to final bind-off. The process uses your arms as needles, casting on 20 stitches and working in a simple knit stitch. Success hinges on matching yarn weight to the desired chunkiness and maintaining even tension to prevent curling edges or gaping holes.
That 40-minute timeline is for the knitting itself. It doesn’t include the hour you might spend choosing the right wool or the day your finished blanket needs to dry after blocking. The speed is the appeal, but the real work is in the three decisions you make before you cast the first loop: yarn type, yarn quantity, and your tension strategy.
What follows: a breakdown of why roving wool beats standard chunky yarn, the exact needle-free method, how to fix the most common tension mistakes, and the non-negotiable blocking step that turns a lumpy knit into a heirloom-ready gift.
Key Takeaways
- Use 7 pounds of roving wool for a standard-sized arm-knit baby blanket; regular chunky yarn won’t give the same dense, cozy drape.
- Control tension by feel — pull each loop firm enough to be secure but loose enough to let the yarn breathe, or the edges will curl or sag.
- Block the finished blanket by wetting it, pinning it to shape on mats, and letting it dry completely; this step alone can add a professional finish.
- Check your stitch count every few rows; it’s easy to accidentally add or drop a stitch at the row ends, turning your rectangle into a trapezoid.
- For a more traditional knit, switch to 24-inch circular needles and worsted weight yarn; it’s slower but offers more pattern options and durability for frequent washing.
Why Arm Knitting Works for Baby Blankets (And When It Doesn’t)
Arm knitting turns your forearms into giant knitting needles. This method uses super-bulky roving wool, creating a blanket with massive, soft stitches that works up incredibly fast. The resulting blanket is light, breathable, and has a beautiful, modern drape. It’s less about intricate patterning and more about showcasing the texture of the wool itself.
The trade-off is care. A roving wool blanket is a delicate showpiece. It’s not built for the rigors of daily nursery use, spit-up, or frequent machine washing. The loose twist of the fibers can pill or felt with rough handling. Think of it as a special occasion blanket—perfect for photo props, tummy time on a clean floor, or a cozy layer in the stroller.
Where this goes sideways: Using regular chunky yarn instead of roving wool. Chunky yarn is plied, meaning multiple strands are twisted together for strength. It won’t give you the same seamless, cloud-like stitch definition, and your 40-minute project can quickly become a stiff, unforgiving slog.
For a blanket that will see daily love and need regular washing, a switch to traditional needles and machine-washable yarn is the better long-term play. The best baby blankets for durability often use these methods.
Roving Wool vs. Traditional Baby Yarn: A Quick Comparison
| Feature | Arm Knitting (Roving Wool) | Traditional Knitting (Worsted/DK Yarn) |
|---|---|---|
| Speed | Very fast (30-60 minutes) | Slow (10-30 hours) |
| Durability | Delicate, dry clean or spot clean only | Durable, often machine-washable |
| Best For | Quick gifts, photo props, decorative throws | Everyday use, heirloom pieces, frequent washing |
| Skill Level | Absolute beginner | Beginner to advanced |
| Texture | Ultra-soft, single-ply, cloud-like | Varied, from soft to sturdy, plied |
What You’ll Need Before You Start
Gathering the right materials is the difference between a smooth forty minutes and a frustrating afternoon. Here’s the short, non-negotiable list.
- Roving Wool: 7 pounds (approx. 3.2 kg) is the magic number for a good-sized blanket. This is not the time to skimp. Brands like We Are Knitters sell roving wool in large hanks specifically for this purpose. Look for wool labeled “roving,” “single-ply,” or “merino top.”
- Scissors: A sharp pair for cutting the wool.
- A Large, Clean Floor Space: You’ll be working on the floor to manage the weight and length of the wool.
- Patience for Joining: You’ll need to join new skeins. Simply tie the ends together in a tight, secure knot and keep knitting. Weave the tails in later.
Before you start: Clear a space longer than your wingspan. Arm knitting is a full-body motion, and you will bump into coffee tables. Also, roving wool sheds. Don’t wear black pants.
If the delicacy of roving wool gives you pause, consider that many organic baby blankets made from machine-washable cotton or bamboo offer a similar softness with much easier care.
The 6-Step Arm Knitting Method (With Pictures)
This process is a rhythmic loop transfer from one arm to the other. Don’t overthink the first row; muscle memory takes over by row three.
Step 1: Casting On
Make a slipknot about 6 feet from the end of your wool. Place this loop on your right wrist. This long tail is for casting on. Holding the working yarn (the yarn coming from the skein) in your right hand, use your left hand to pull a new loop of working yarn through the loop on your wrist, creating a new stitch on your right forearm. Repeat until you have 20 stitches sitting on your right arm. They should be snug but not cutting off circulation.
Step 2: The First Knit Row
Move the first stitch from your right arm over your hand and off your arm. You now have the working yarn in your right hand and an empty left hand. Reach your left hand through the next stitch on your right arm, grab the working yarn, and pull a new loop back through onto your left arm. This transfers one stitch. Continue across, transferring all stitches from your right arm to your left arm.
Step 3: Repeating the Rows
Now your stitches are on your left arm. Reverse the process: take the first stitch off your left arm, then knit across from left to right. This back-and-forth is the entire stitch pattern. Knit each new loop through the front of the stitch on your arm—this is the basic knit stitch.
Step 4: Joining a New Skein
When you’re about 3 feet from the end of your current skein, stop. Tie the end of the new skein to the old end with a firm, square knot. Leave 6-inch tails. Continue knitting, carrying the knot along. It will get hidden in the fabric. Weave the tails in securely later.
Step 5: Knowing When to Stop
Knit until you have about 25 rows. The blanket will look square. A good check is to lay it out flat; it should be noticeably wider than it is tall at this point. For a larger toddler blanket, you’d simply add more rows.
Step 6: Binding Off
Knit two stitches from your left arm to your right. Use your fingers to lift the first stitch on your right arm over the second stitch and off. You now have one stitch on your right arm. Knit the next stitch from the left arm onto the right arm, so you have two again. Lift the first over the second. Repeat this across until one loop remains. Cut the yarn, leaving a 12-inch tail, and pull the tail through the final loop to secure it.
Shaping and Finishing Your Blanket
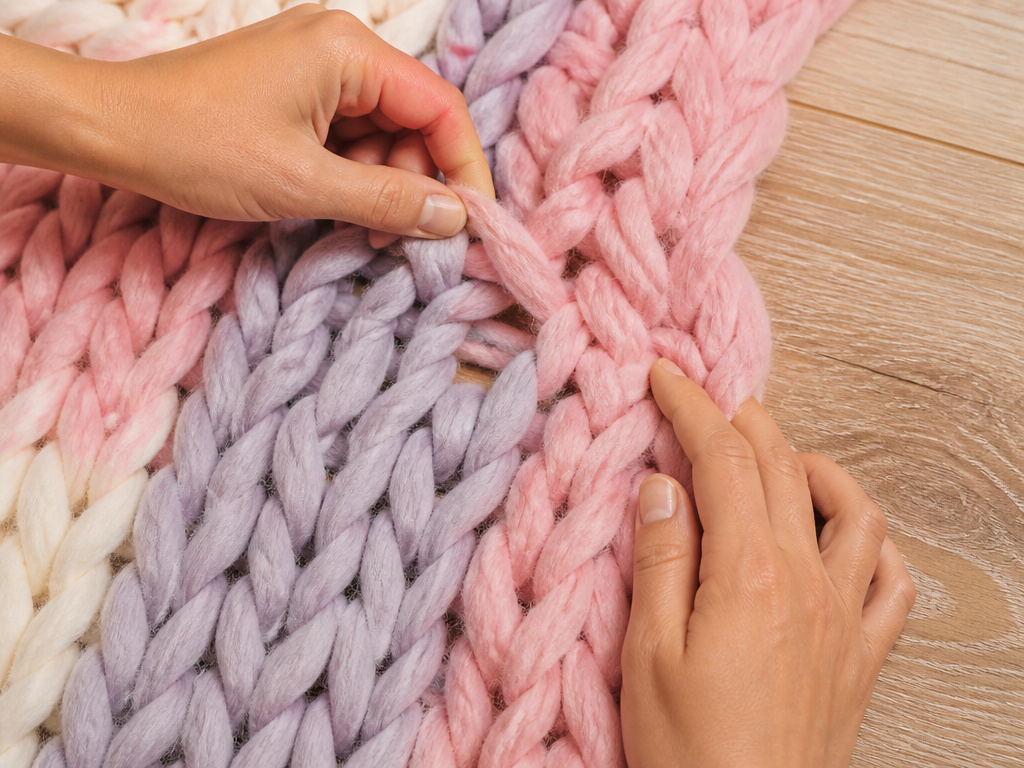
The knitting is done, but the blanket isn’t finished. Off the arm, it will look loose and a bit messy. This is normal.
Weaving in Ends
Use your fingers or a large plastic yarn needle to thread the starting and ending tails back through the body of the blanket. Zig-zag through the stitches for about 4 inches, then trim the excess close to the fabric. The friction of the wool will hold it. Do this for every join.
Fixing Mistakes and Shaping Edges
Lay the blanket flat on a clean floor. Look for accidental holes or sections that seem tighter than others. * For a hole: Gently tug the surrounding stitches to redistribute the yarn. The fabric is forgiving. * For uneven edges: Gently “massage” the yarn along the edge toward the corners. Stretch and pat it into a straight line. If one side is longer, you likely added stitches. You can gently tighten a few edge loops on the longer side to pull it back.
The part nobody mentions: Your first blanket will not be a perfect rectangle. That’s okay. The final blocking step fixes a multitude of sins. The goal here is just to get it roughly into shape before it gets wet.
This hands-on fixing is what separates a homemade item from a store-bought one. It’s the same attention to detail you’d apply when selecting the best personalized baby blankets—the finishing touches matter most.
The Non-Negotiable Step: Blocking Your Blanket
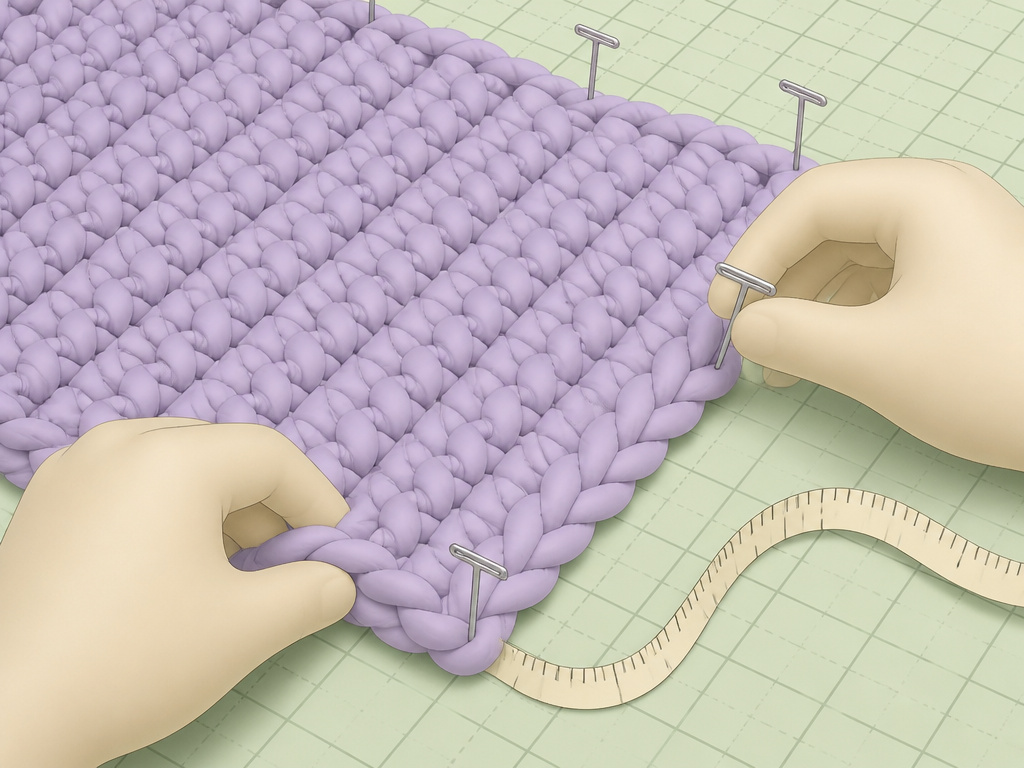
Blocking is the secret weapon of knitters. It sets the stitches, evens out tension, and gives your blanket its final professional shape. For a baby blanket, it also ensures any loose fibers are settled, making it safer for little ones.
Step 1: Gently Wash
Fill a clean sink or tub with lukewarm water and a drop of mild, fragrance-free detergent. Submerge the blanket and press it gently. Do not agitate, wring, or twist. Let it soak for 15 minutes.
Step 2: Remove Water
Drain the sink. Lift the blanket and press it against the side to remove water. Lay it flat on a thick, clean towel. Roll the towel and blanket together into a log and press firmly to squeeze out moisture. This prevents stretching.
Step 3: Pin to Shape
Lay your blocking mats or a fresh, dry towel on a flat surface. Place the damp blanket on top. Gently stretch it to its intended dimensions, using a tape measure to ensure it’s square. Pin the corners down with rust-proof T-pins, then pin every few inches along the edges.
Step 4: Dry Completely
Walk away. Let the blanket dry fully, which can take a full day. Do not remove the pins or move it until it is bone-dry. This patience is what locks in the perfect shape.
Step 5: Store Properly
Once dry, unpin it. Store your finished blanket in a cool, dry place away from direct sunlight to prevent the wool from fading or becoming brittle. For a blanket meant for more active use, you’d want to explore the best receiving blankets or muslin blankets designed for easy care.
The Traditional Needle Alternative: Circular Knitting
If you love the idea of a handmade blanket but need something more durable, circular knitting needles are the answer. They hold hundreds of stitches comfortably, and the work rests in your lap, not on your straining wrists.
For a baby blanket, you’d typically use 24-inch circular needles and a worsted or chunky weight yarn like Paintbox Yarns Simply Chunky. This opens up a world of simple patterns—garter stitch, stockinette, or easy ribs. While it takes longer, the result is a blanket that can handle the washing machine and become a true everyday companion, much like the durable options in our guide to blankets for newborns.
I prefer circular needles for any blanket I intend to actually use in the crib. The fabric is denser, the ends are more secure, and I don’t hold my breath every time it needs a wash. Arm knitting is for the magic; circular needles are for the mess.
Choosing Your Circular Needle & Yarn Combo
| Blanket Size | Recommended Cable Length | Good Yarn Weight | Sample Project Time |
|---|---|---|---|
| Newborn/Photo Prop | 24 inches (60 cm) | Worsted (#4) | 10-15 hours |
| Standard Crib Blanket | 32 inches (80 cm) | Chunky (#5) | 15-25 hours |
| Toddler/Lapghan | 40 inches (100 cm) | Super Bulky (#6) | 20-30 hours |
Before You Go
Arm knitting a baby blanket is a uniquely satisfying project. In less than an hour, you can create a stunning, cozy gift with just your hands and some wool. Remember the core recipe: 7 pounds of roving wool, 20 stitches, 25 rows, and a patient blocking session. Embrace the imperfect, organic look—it’s part of the charm.
For a blanket that will become a daily snuggle partner, invest the extra time in circular needles and washable yarn. That’s how you build an heirloom. Whether you choose the speed of arm knitting or the durability of traditional methods, the love stitched into a handmade blanket is what a parent will cherish most.
Frequently Asked Questions
Is arm knitting really suitable for beginners?
Yes, absolutely. It’s often the first knitting project people ever try. There are no needles to manage, the stitches are huge and easy to see, and the project finishes before frustration can set in. If you can make a slipknot and pull a loop through another loop, you can arm knit.
How do I wash an arm-knit baby blanket?
Spot clean only. Blot spills immediately with a damp cloth and mild detergent. For an overall refresh, consider professional steam cleaning. Do not machine wash or soak a roving wool blanket; the fibers will felt and shrink irreversibly. For a washable handmade option, look to knit or crochet with superwash wool or cotton.
Can I use regular chunky yarn instead of roving wool?
You can, but the result will be different. Plied chunky yarn is stronger but less fluffy. Your blanket will be heavier, stiffer, and the stitches won’t have the same smooth, roving look. It also takes more yarn by weight. For the classic arm-knit aesthetic, roving wool is worth the search.
How big will my blanket be?
With 7 lbs of roving wool, 20 stitches, and 25 rows, you’ll get a blanket roughly 30 inches by 40 inches. This is a perfect size for a stroller blanket, tummy time mat, or decorative crib layer. You can adjust the size by adding more stitches for width or more rows for length.
What’s the best way to fix a mistake while arm knitting?
Most mistakes are easy to fix without unraveling. If you drop a stitch and see a hole, use your fingers to gently pull the loose yarn up through the stitches above it. If a section is too tight, tug on the surrounding stitches to redistribute the yarn. The scale of the stitches makes fixes forgiving.
Why does my blanket’s edge look wavy or curled?
This is a tension issue. A tight edge curls inward; a loose edge waves outward. When blocking, pay extra attention to pinning the edges straight. For future projects, consciously relax your grip on the first and last stitch of each row. Consistent tension comes with practice.
