
How to Stitch Baby Pillow | Safety & Size Guide
This post contains affiliate links. As an Amazon Associate we earn from qualifying purchases.
To stitch a safe baby pillow, you must follow two sets of rules: the federal safety standards that ban certain infant pillows and the construction specs—like a minimum 12 mm seam allowance and fabric that withstands 15 lbs of force—that prevent seam failure and fill escape. This applies to pillows for children over one year, like the popular Give Kids the World Wish Pillow, which uses a specific 10” x 15” flannel design.
That “withstands 15 lbs of force” clause isn’t a suggestion. It’s from the Consumer Product Safety Commission’s testing protocol for infant pillows and cushions. If your home-sewn seam pops under less pressure, the pillow becomes a hazard the moment a child leans on it. The difference between a cozy keepsake and a risky item is a handful of millimeters in the seam allowance and the right thread.
What follows is the breakdown: the federal rules that define what you can even make, the step-by-step for a proven safe design like the Wish Pillow, and the material specs that turn fabric and fiber into something that lasts through years of washes. By the end, you’ll know how to read a regulation and translate it into a stitch length.
Key Takeaways
- Pillows for infants under one year that are loosely filled and conforming are federally banned; only nursing pillows designed solely for feeding aid are exempt.
- For child pillows, seam strength is non-negotiable—aim for a construction that meets the CPSC’s 15-pound force standard, which typically requires a safety stitch and a 12 mm (1/2 inch) seam allowance.
- The Give Kids the World Wish Pillow blueprint is a trusted model: use gender-neutral flannel, cut to 10” x 15”, and incorporate a 2-inch minimum overlap in the back closure for small hands.
- Fabric choice dictates durability; tight-weave cotton or flannel prevents fill escape, while polyester thread maintains strength after repeated washing.
- Always use a pillow form or stuffing designed for children’s products, avoiding loose, granular fills that pose a suffocation risk.
The First Stitch: Understanding What You’re Allowed to Make
You cannot stitch just any baby pillow. Federal law draws a bright line. The CPSC bans infant pillows and cushions that meet all of five criteria: a flexible fabric cover, loose granular filling, easy flattening, the ability to conform to an infant’s body or face, and intended use for children under one year old.
The part nobody mentions: This ban exists because these products create a suffocation hazard. An infant lacks the neck strength to turn their head if their face presses into a conforming surface.
The exemption is for nursing pillows. The regulation defines these as products intended solely to position and support an infant close to a caregiver during feeding. They can rest on or wrap around the caregiver. If a pillow is marketed or designed for lounging, sleeping, or tummy time for an infant, it falls under the ban. This is why you’ll see strict labels on commercial nursing pillows stating they are not for sleep.
When you stitch a pillow for a child over one year, you’re in clearer territory, but the safety principles remain. Your goal is to create a supportive, non-conforming surface. That starts with rejecting the wrong materials.
Before you start: Never use polystyrene beads, kapok, or any loose, granular fill for a young child’s pillow. These materials can shift and conform, creating a hazardous surface. They also leak through inadequate seams. Opt for a certified pillow form or polyester fiberfill that meets OEKO-TEX standards.
The 5-Step Wish Pillow Construction (With a Safety Twist)
The Give Kids the World Wish Pillow is a perfect project blueprint because its design inherently avoids hazardous traits. It’s a flat, rectangular pillow with a fabric pocket on the front, intended as a comfort item for sick children. Its instructions provide a real-world sewing guide, but we’re overlaying the safety specs the original pattern assumes.
Fabric and Cutting Specs (per Give Kids the World instructions): – Pillow Fabric: 1 yard of flannel yields 4 pillows. Cut fabric into 36” lengths, then cut widthwise to achieve approximately 10.5” to 11” wide strips. Finished size will be 9-3/4” to 10” wide x 15” long after hemming. – Pocket Fabric: 1 yard of cotton or flannel yields 12 pockets. Cut to the same width as the pillow fabric, approximately 11.5” long before hemming. – Fabric Type: Use new, gender-neutral flannel or cotton. Avoid baby prints, military themes, black, or white.
Step 1: Hem with Width in Mind
Hem both raw ends of the pillow fabric piece. Hem only one raw end of the pocket piece. Use a 1/4” to 1/2” double fold hem, taking up about 1-1.5 inches of total length. Accuracy isn’t critical for the look, but consistent hem width ensures your final pillow length hits the 15-inch target.
Skip this, and your pillow dimensions will be off by over an inch, making the pocket placement awkward.
Step 2: Pin Pocket to Pillow
Match the hemmed edge of the pocket to the pillow fabric, right sides together. Pin along the entire length. This seam will become the top of the pocket.
Step 3: Stitch the Pocket Seam
Sew the pocket to the pillow fabric with a straight stitch. This is a structural seam. Use a shorter stitch length (2.0-2.5mm) for higher seam strength. This is your first application of the CPSC’s seam strength concern—a longer, looser stitch is easier to rip.
Step 4: Fold and Pin the Pillow Case
Fold the pocket material toward the center of the pillow piece (wrong sides together). Now, measure 15 inches from the pocket seam along the pillow fabric. Fold the pillow fabric at that point, bringing the right sides together. You are creating a pillowcase with the pocket on the outside. The raw edges on three sides should align. Pin generously.
Step 5: Serge or Stitch, Then Turn
This is the critical step. Before sewing, ensure the back opening has an overlap of at least 2 inches. This allows a child’s hands to grip the pillow safely.
Where this goes sideways: Using only a straight stitch on the side seams. For durability that approaches the 15 lbs of force standard, you need a safety stitch (a serger/overlock stitch) or a straight stitch followed by a zigzag seam finish. Clip the corners, turn the pillow right side out, and insert your chosen pillow form.
From Flannel to Firmness: The Specs That Matter
The Wish Pillow pattern works because its materials and dimensions are chosen for safety and durability. When you deviate from it, you need to know what each specification controls.
Let’s talk about seam strength. The CPSC infant pillows webinar states seams must withstand 15 lbs of force applied evenly over 5 seconds and held for 10 seconds. How do you, at home, approximate that?
| Construction Element | Minimum Safe Spec | Why It Matters |
|---|---|---|
| Seam Allowance | 12 mm (1/2 inch) | Prevents seam failure under stress; commercial hotel standard for laundering durability. |
| Stitch Type | Safety Stitch (or Straight + Zigzag) | Resists unraveling and seam separation better than a single straight stitch. |
| Thread | Polyester Core Thread | Maintains strength when wet and doesn’t shrink like cotton thread. |
| Fabric Weave | Tight Weave (200+ thread count cotton/blend) | Prevents pillow form fill from escaping through the fabric itself. |
The nursing pillow safety standard (16 CFR 1242) adds another layer: firmness. It requires that a pillow’s surface must resist compression, needing more than 10 Newtons (2.24 lbs) of force to indent 1 inch. While this formally applies to nursing pillows, the principle is sound for any child’s pillow: it should provide support, not collapse.
This is where fill selection is crucial. For a DIY pillow, a pre-made pillow form is the safest, easiest choice. If using loose fill, select a cluster fiber fill or HCS siliconized polyester fiber (like 7D denier). These materials resist clumping and maintain loft. The weight matters too—a standard 20″x26″ pillow needs at least 500-600 grams of 7D fill for proper support. Underfill it, and it flattens into a conforming hazard.
Wish Pillow vs. Standard Pillowcase: A Size and Purpose Guide
 You might just want a simple pillowcase for an existing toddler pillow. The construction rules are similar, but the dimensions change. A standard child’s pillowcase is smaller than an adult one.
The UC Davis Children’s Hospital donation guidelines specify a standard size of 20″ x 26″. They note that from a 40″x40″ piece of fabric (1 yard of 45″ wide fabric), the finished case will be roughly 19.5″ x 29.5″. This is a great, safe size for a pillow for a 5 year old.
| Project Type | Finished Dimensions | Key Safety Feature | Best For |
|---|---|---|---|
| Give Kids the World Wish Pillow | 10″ wide x 15″ long | Flat, non-conforming; secure pocket; 2″ back overlap. | Comfort object, travel, donation. |
| Standard Child’s Pillowcase | 19.5″ x 29.5″ | Fits a standard toddler pillow; envelope closure recommended. | Everyday use for a toddler pillow in a crib or bed. |
| Nursing Pillow (Commercial Only) | Varies (C-shaped, U-shaped) | Must meet federal regulation 16 CFR 1242 for firmness and containment. | Feeding support only, for infants. |
The bottom line: a pillowcase is simpler. Use an envelope closure (an overlapping flap in the back) instead of a zipper to avoid small parts. Always pre-wash your fabric to account for shrinkage. For the pillow itself, selecting one from a list of recommended pillows for older kids is safer than a DIY internal cushion unless you are highly confident in your fill and firmness control.
Tools and Materials: Building a Safe Sewing Kit
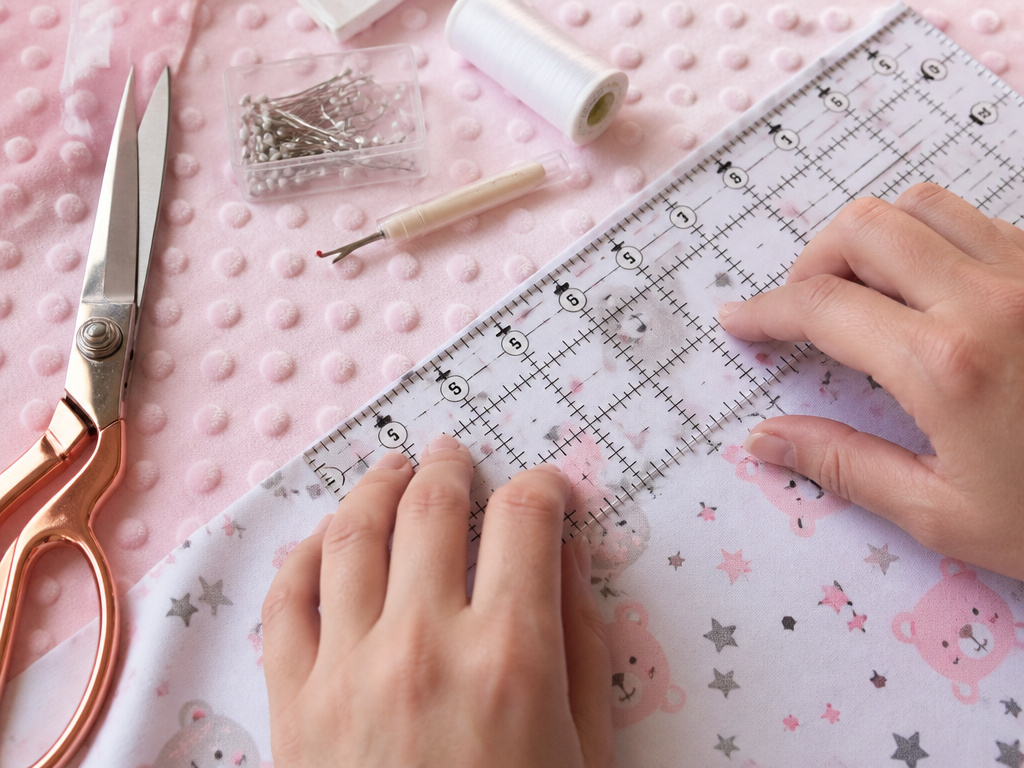 You don’t need professional equipment, but you do need the right tools for the job. This list prioritizes durability over fancy features.
- Sewing Machine: Any machine that can do a straight stitch and a zigzag stitch is sufficient. A serger is excellent for seam finishing but not required.
- Thread: Polyester thread all the way. It’s stronger when wet and won’t shrink. Don’t use old cotton thread from your grandma’s stash for this project.
- Fabric Scissors & Pins: Sharp shears for clean cuts. Glass-head pins are easier to see and won’t melt if you iron over them.
- Measuring Tools: A clear quilting ruler and a fabric marker (chalk or water-soluble) are more accurate than a tape measure alone.
- Iron and Ironing Board: Pressing your seams open is not just for looks. It reduces bulk and makes the next sewing step more accurate, leading to a stronger final product.
The one tool people skip: A seam ripper. You will use it. Accept that. Taking the time to re-stitch a wobbly seam is how you ensure consistent seam strength. A wavy seam is a weak seam.
Frequently Asked Questions
Can I make a pillow for a newborn?
You should not make a pillow for a newborn. The CPSC ban on infant pillows and cushions applies to products for children under one. The only pillow-like product appropriate for a newborn is a nursing pillow used strictly for feeding support while the infant is awake and supervised, and even those are best purchased as certified commercial products that meet the mandatory nursing pillow rules.
What is the safest filling for a DIY baby pillow?
The safest option is a pre-made, certified pillow form designed for children’s products. If using loose fill, choose a cluster fiber fill or OEKO-TEX certified polyester fiberfill (like 7D HCS siliconized). These resist moisture, clumping, and are hypoallergenic. Never use down, feathers, memory foam chunks, or polystyrene beads for a young child’s pillow.
How do I make sure the seams are strong enough?
Use a short stitch length (2.0-2.5mm) and a minimum 1/2 inch seam allowance. Sew each seam with a straight stitch, then sew again just inside the seam allowance with a zigzag stitch to lock the raw edge and prevent fraying. This “straight-stitch-plus-zigzag” method significantly increases seam strength and is the home sewer’s best approximation of a commercial safety stitch.
What size should a toddler’s pillow be?
Standard toddler pillow is often 13″ x 18″. A common transition size for preschoolers is 16″ x 20″. The standard child’s pillowcase size referenced by UC Davis (20″x26″) is designed to fit these smaller pillows with ample overhang. Always ensure the pillow is firm enough that it doesn’t fold over the child’s face.
Can I decorate a baby pillow with ribbons or buttons?
No. Do not add any decorative elements like buttons, ribbons, pom-poms, or appliqués that are not securely sewn down with every edge finished. These are choking and strangulation hazards. If you want a decorative touch, use fabric paint designed for textiles or choose a printed fabric as part of your complete bedding for a nursery theme.
Before You Go
Stitching a baby pillow merges craft with regulation. The safe path is clear: avoid any project for infants under one, adopt the proven dimensions and closures of patterns like the Wish Pillow, and engineer your seams to survive more than a gentle tug. That means polyester thread, generous seam allowances, and a tight fabric weave. Your reward isn’t just a cute pillow. It’s a durable object that provides genuine comfort without hidden risk. So measure twice, stitch once, and always press your seams.
